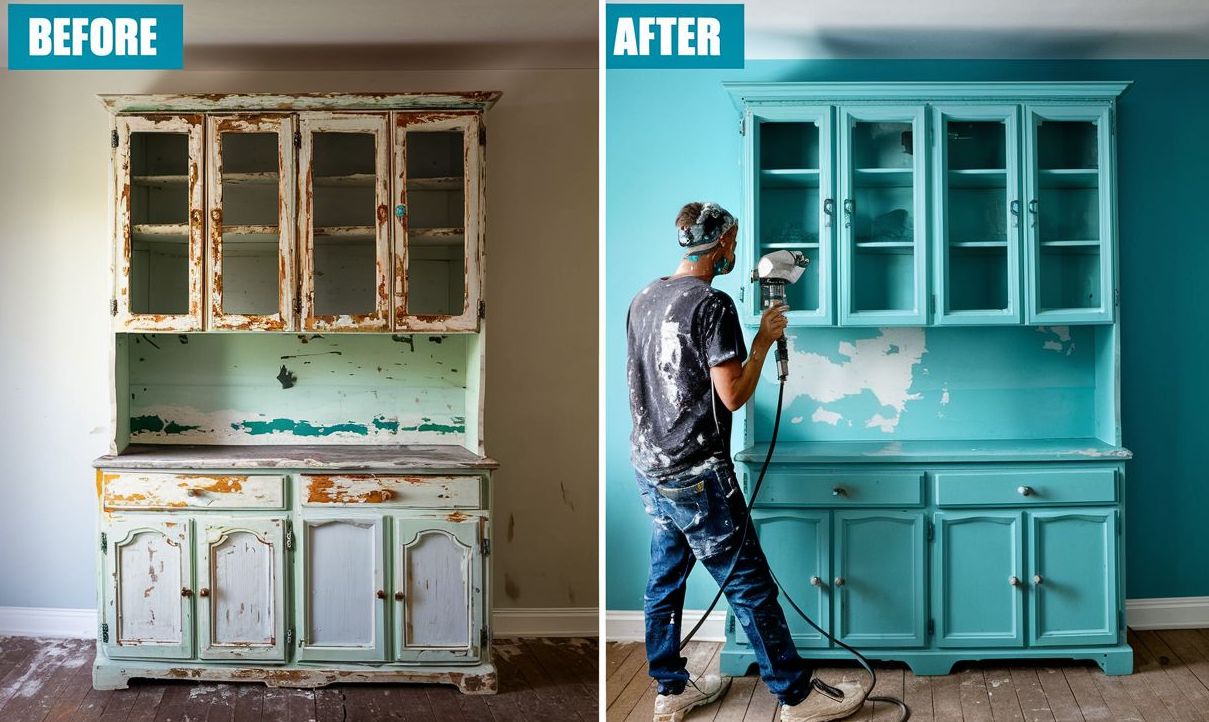
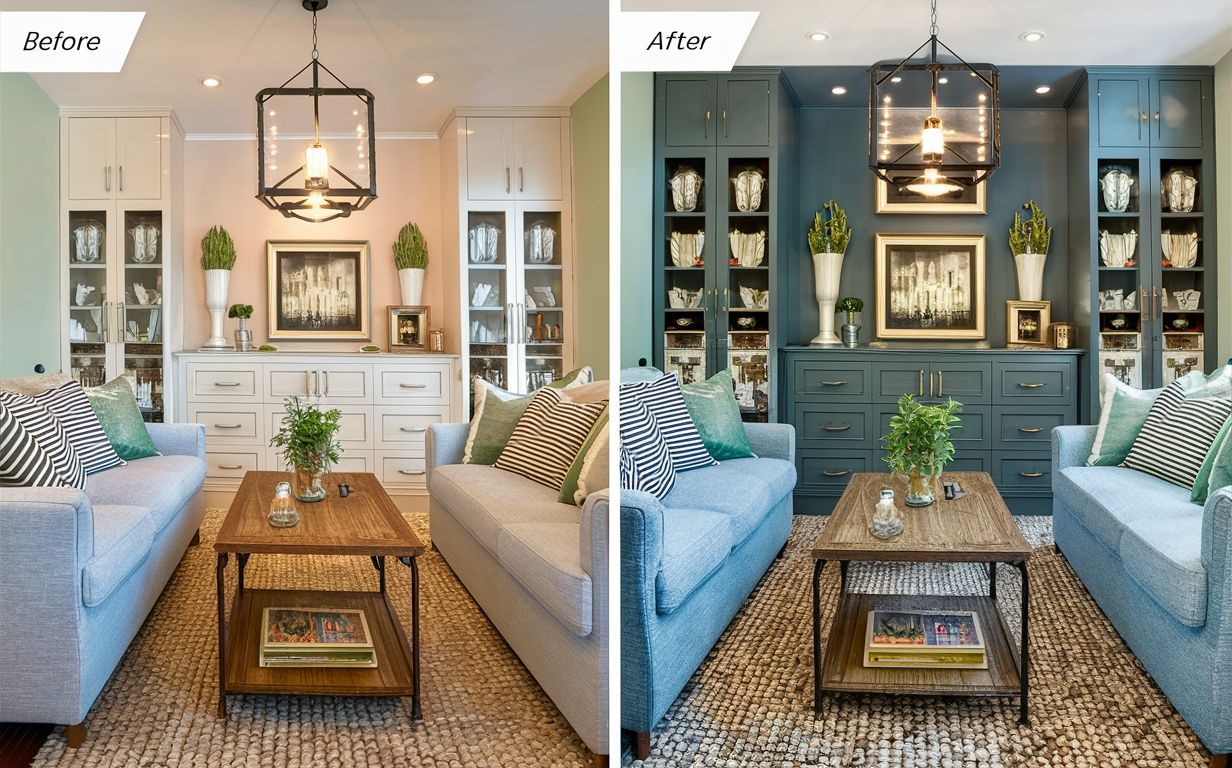
Revamping your cabinetry, whether located in the kitchen, bathroom, laundry area, or bar, with a new coat of paint is a transformative move that can breathe new life into your space. Yet, the quest for that seamless, professional-grade finish can seem daunting without the appropriate equipment. Enter the realm of high-quality handheld paint sprayers. It’s time to set aside your traditional paint rollers and brushes. Through this detailed exploration, we’ll navigate the essentials of cabinet painting and uncover the top handheld paint sprayer for cabinets capable of delivering eye-catching, professional-quality outcomes. This guide is tailored for both DIY aficionados and seasoned painting professionals, ensuring everyone can achieve spectacular results with their cabinet painting projects.
Advantages of Choosing a Handheld Paint Sprayer for Cabinets
Before we delve deeper into the specifics of selecting a paint sprayer, it’s important to understand why it stands out as the superior choice for painting cabinets. Employing a handheld paint sprayer for this task brings forth a myriad of benefits that significantly uplift the quality and efficiency of your project:
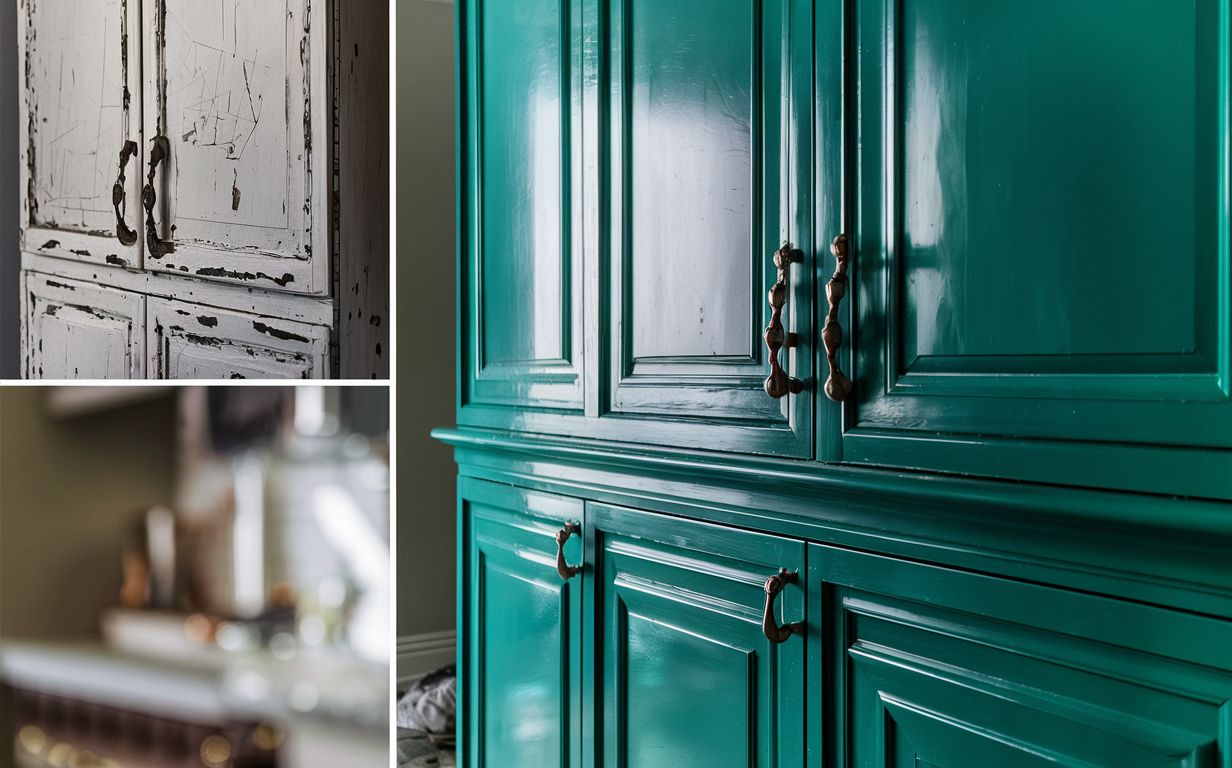
- Impeccable Finish: Say goodbye to unsightly streaks. Paint sprayers excel in delivering a smooth, even coat, a feat rarely matched by brushes or rollers, which is paramount for that sought-after professional cabinet appearance.
- Swift Application: With their ability to cover expansive areas rapidly, paint sprayers slash the time traditionally needed, a boon for projects involving numerous cabinets.
- Consistent Coverage: Achieve uniform application with ease, even in those hard-to-reach nooks, crannies, and elaborate details, ensuring a cohesive look across all cabinet surfaces.
- Enhanced Accessibility: The design of cabinets, often featuring challenging recesses and tight angles, poses no problem for sprayers, guaranteeing a thoroughly painted finish without compromise.
- Paint Versatility: From primers and stains to topcoats, sprayers handle various paint types with aplomb, allowing you to perfect the look and durability of your cabinetry.
- Customization at Your Fingertips: Adjustable spray settings allow you to cater to the unique aspects of your cabinet project, from spray patterns to pressure levels.
- Ease of Use: Compared to the manual labor of brushing or rolling, sprayers offer a more ergonomic solution, reducing strain for those extensive cabinet endeavors.
- Aesthetic Excellence: The flawless outcome achieved with a sprayer not only adds a professional flair to your cabinets but also elevates the overall ambiance of your space.
- Minimized Waste: Designed to curtail overspray, handheld paint sprayers promote efficient paint use, keeping your work area cleaner and reducing waste.
- Simplified Cleanup: Most sprayers boast straightforward cleaning processes, which ease post-project cleanup efforts, especially when adhering to regular maintenance.
- Creative Textures: For those seeking a unique touch, adjustable sprayer settings allow you to experiment with different textures, personalizing your cabinets even further.
- Long-term Investment: Investing in a handheld paint sprayer pays dividends. It will prove its utility in numerous future projects beyond cabinet painting and enhance its value in your DIY toolkit.
In summary, opting for a paint sprayer when tackling cabinet painting not only simplifies the process but elevates the finish quality, offering a plethora of customizable features. Irrespective of your experience level—be it as a professional painter or a DIY enthusiast—a paint sprayer emerges as an indispensable asset for achieving those eye-catching cabinet transformations.
Key Considerations for Selecting the Ideal Handheld Paint Sprayer for Cabinets Refinishing

Investing in a paint sprayer for your cabinet refinishing endeavor is a significant decision that requires careful consideration of several crucial factors. Ensuring you select the most suitable handheld paint sprayer for your needs can drastically affect the outcome and efficiency of your project. Let’s delve into these vital considerations to guide you in making an informed choice.
Choosing the Right Type of Handheld Paint Sprayer for Cabinets and More
- HVLP Sprayers: Known for their precision, HVLP (High-Volume, Low-Pressure) sprayers offer a meticulous application with minimal overspray, making them perfect for detailed cabinet work. Their ability to produce a high volume of paint at lower pressures ensures a finer finish, ideal for achieving that flawless look on cabinets.
- Airless Sprayers: For projects requiring rapid coverage, airless sprayers are unbeatable. They excel in covering extensive areas swiftly but are mindful of their propensity for increased overspray, which may require additional preparation to manage.
- Compressed Air Sprayers: Offering unmatched versatility, compressed air sprayers utilize compressed air to atomize paint, affording you the flexibility to adjust spray patterns. While they open up a range of textural possibilities, mastering their use might demand a bit more expertise.
Assessing Your Project’s Scale:
The scope of your cabinet painting project plays a pivotal role in determining the most appropriate sprayer type:
- Smaller to medium-sized projects or kitchens could benefit greatly from the finesse of an HVLP sprayer.
- An airless sprayer’s efficiency can significantly reduce the time and effort involved for larger-scale endeavors.
Considering Sprayer Capacity:
- The capacity of your paint sprayer’s container should align with the project size. A larger reservoir is convenient for extensive projects, minimizing the need for frequent refills. Conversely, a compact container enhances maneuverability and ease of cleaning for smaller tasks.
Adjustability for Precision:
- Opt for a sprayer that offers comprehensive adjustability regarding spray patterns, pressure, and flow rate. This flexibility allows for a tailored approach to your cabinets’ unique contours and details, ensuring a uniform coat across all surfaces.
Ease of Maintenance:
- The longevity and performance of your paint sprayer hinge on its ease of maintenance. A model designed for straightforward disassembly and cleaning can save you time and preserve the sprayer’s efficiency, preventing issues related to paint accumulation.
Balancing Price with Quality:
- Handheld paint sprayer for cabinets are available across a spectrum of price points. While the allure of a bargain is strong, investing in a sprayer that balances cost with quality craftsmanship can provide better value in the long run through enhanced durability and performance.
By carefully weighing these factors against your specific project needs and preferences, you can ensure that you select a paint sprayer that not only meets but exceeds your expectations for cabinet painting. A well-chosen sprayer becomes an invaluable tool in achieving that professional, eye-catching finish with greater ease and satisfaction.
Graco Ultra Cordless Airless Handheld Paint Sprayer: The Ultimate Tool for Cabinet Refurbishing
Introducing the Graco Ultra Cordless Airless Handheld Paint Sprayer for cabinets—a game-changer in the world of cabinet painting. This state-of-the-art tool marries the convenience of cordless freedom with the unparalleled efficiency of airless spraying technology. Designed to cater to DIY aficionados and professional painters, this handheld sprayer elevates the painting experience to new heights of ease and excellence.
Unleashing Cordless Convenience:
The standout feature of the Graco Ultra Cordless is its cordless operation. Free from the constraints of power outlets, users can navigate around the project area—be it kitchen cabinets, bathroom vanities, or even more intricate spaces like basement bar cabinetry. This mobility is not just a convenience; it’s a productivity booster that enables you to cover every angle and corner precisely.
Airless Technology for Superior Results:
At the heart of the Graco Ultra Cordless is its airless spraying mechanism. This technology transforms paint into a fine, atomized mist, ensuring an even coat that dries to a smooth, professional finish. This capability guarantees consistently stellar results across various cabinet surfaces and designs without the common pitfalls of uneven coverage or brush marks.
Customizable Performance:
Understanding that no two cabinet projects are alike, the Graco Ultra Cordless has adjustable controls and pressure settings. This adaptability allows painters to fine-tune the sprayer’s performance to suit different materials and surfaces, ensuring flawless coverage while minimizing the risk of overspray. It’s a level of customization that respects the unique demands of each project.
Simplified Cleanup Process:
Post-painting cleanup can often be a deterrent, but not with the Graco Ultra Cordless. Its design emphasizes easy disassembly, allowing for straightforward cleaning. Moreover, its compatibility with water-based paints means you can expect a quicker, more hassle-free cleanup, sparing you more time to admire your beautifully transformed cabinets.
A Testimonial to Its Excellence:
Our experience with the Graco Ultra Cordless on a recent basement bar cabinet project stands as a testament to its prowess. The ease of use and the exceptional finish it delivered solidifies its status as the top pick for anyone serious about cabinet refinishing. However, it’s essential to weigh its higher price point against the unparalleled value and professional-grade results it offers.
In summary, the Graco Ultra Cordless Airless Handheld Paint Sprayer for cabinets represents a significant leap forward in cabinet painting technology. Offering unmatched portability, efficiency, and ease of use, it sets a new standard for what one should expect from a painting tool. Whether you’re a seasoned professional or a passionate DIYer, this sprayer promises to transform your cabinet painting projects into a less tedious, more rewarding endeavor.
Graco Magnum X5 Airless handheld Paint Sprayer for Cabinets
The Graco Magnum X5, an airless paint sprayer, emerges as a formidable ally for the DIY enthusiast and the professional painter. Renowned for its adaptability, robustness, and unwavering performance, the Magnum X5 bridges the gap between ambitious home improvement projects and professional-grade results. Designed with a potent yet efficient motor, this sprayer effortlessly handles a myriad of coatings, making it a versatile choice for any painting task.
Adaptable for Every Project:
The key to the Magnum X5’s appeal is its adjustable pressure controls, which empower users to manage paint flow and spray output precisely. This adaptability proves invaluable when tackling cabinets, where surfaces may vary in texture or complexity or when intricate details demand a gentle touch. The ability to tailor the sprayer’s performance ensures a flawless finish, regardless of the project’s specific challenges.
Built to Last:
Durability is at the core of the Magnum X5’s design. Its sturdy construction not only promises longevity but also represents a cost-effective solution for those with an eye on multiple future projects. This sprayer is not just an investment in a single task but a tool for life’s myriad renovations.
Ease of Use and Maneuverability:
Despite its powerful capabilities, the Magnum X5 boasts a compact, lightweight design that enhances its user-friendliness. This feature is especially beneficial when navigating the confined spaces of cabinetry or extending reach to those hard-to-access areas. The X5’s design acknowledges the physical demands of painting projects, prioritizing ease and comfort without compromising on performance.
Comparison with the Graco Magnum X7:
While our direct experience is with the Graco Magnum X7—a sibling in the Magnum series noted for its excellence in room-scale projects and high-volume tasks—the qualities of the X5 suggest it would perform admirably on cabinet work. The X7’s success in our home office and dining room renovations highlights the series’ quality, though it’s worth noting the X5’s potential edge in mobility and suitability for detailed cabinet work due to its cordless design. The X7, with its extensive hose length and direct paint bucket integration, shines in larger areas where mobility and volume are prioritized.
In conclusion, the Graco Magnum X5 stands out as a reliable, efficient, and versatile tool that promises a professional finish across a broad spectrum of painting projects, from detailed cabinet work to expansive room renovations. Its power, precision, and ease of use make it a valuable asset to both novices and seasoned painters. Whether facing the intricate details of cabinetry or the broad strokes of room painting, the Magnum X5 is equipped to deliver exceptional results, marrying the practicality of airless spraying with the finesse required for top-tier finishing.
Wagner Control Spray Max HVLP: The Beginner-Friendly Choice
The Wagner Control Spray Max HVLP sprayer stands out as an excellent option for those new to cabinet painting or DIY enthusiasts looking for an affordable, straightforward solution. Designed with user-friendliness in mind, it demystifies the process of achieving professional-grade results:
- Adjustable Settings: It offers adjustable spray patterns, allowing for precise control over the finish and ensuring even coverage on various cabinet surfaces.
- Ease of Use: Its lightweight design and comfortable grip make it highly maneuverable and ideal for prolonged use without fatigue.
- Material Compatibility: This sprayer is capable of handling a range of materials, from thin stains to thicker latex paints, simplifying the transition between different types of cabinet finishes.
- Affordability: Positioned as an accessible entry point, it provides a cost-effective way to explore cabinet painting without compromising quality.
Titan ControlMax 1700 Pro: The Professional’s Workhorse
In contrast, the Titan ControlMax 1700 Pro caters to more extensive cabinet painting projects or professionals demanding efficiency and precision:
- High-Efficiency Motor: Its powerful motor and airless technology are designed to cover large surfaces quickly, making it perfect for comprehensive projects or professional applications.
- Reduced Overspray: The ControlMax 1700 Pro features technology that minimizes overspray, making it easier to achieve a clean, precise application while maintaining a tidy work area.
- Customizable Pressure: Adjustable pressure settings allow the sprayer to be tailored to various paints and cabinet textures, offering versatility across projects.
- Durability and Reliability: Built for longevity, this sprayer is a solid investment for those undertaking frequent or large-scale cabinet painting jobs, promising consistent performance over time.
Fuji Semi-PRO 2 HVLP Spray System: Elevating Cabinet Painting to Artistry
The Fuji Semi-PRO 2 HVLP Spray System embodies a fusion of precision engineering and unparalleled performance, setting a new standard for cabinet painting projects. Tailored to meet the exacting demands of professional painters and discerning DIY enthusiasts, this spray system introduces finesse and control previously unattainable with standard painting tools.
Engineered for Excellence:
At the heart of the Semi-PRO 2 system lies a robust 2-stage motor renowned for delivering superior atomization. This core feature ensures that each spray is finely misted, providing a flawless finish that elevates the look of any cabinet. The HVLP (High Volume, Low Pressure) technology at the core of the Semi-PRO 2 minimizes wasteful overspray. It maximizes paint efficiency, allowing for precision that respects the material and the environment.
Customizable for Perfection:
Understanding that the beauty of cabinetry lies in the details, the Semi-PRO 2 system offers an adjustable fan pattern. This critical feature allows painters to adapt the spray to fit their cabinet projects’ unique contours and complexities, ensuring seamless coverage from edge to edge, even on the most intricate designs.
Designed with the User in Mind:
Fuji’s commitment to combining power with user-centric design shines through in the Semi-PRO 2’s comprehensive accessory kit. The heart of this kit, a durable metal spray gun, is complemented by an ergonomically designed handle, which promotes a comfortable, fatigue-free painting experience. This thoughtful inclusion of quality accessories ensures that users are equipped with a tool and a complete system designed for sustained performance and comfort.
A Tool for Transformative Results:
Whether you’re aiming to achieve the refined finish that professional cabinet work demands or a DIY enthusiast ready to take your projects to the next level, the Fuji Semi-PRO 2 HVLP Spray System stands ready to transform your vision into reality. Its combination of precision, power, and ergonomics offers a unique toolkit for those who seek to achieve exceptional and lasting transformations in their cabinet painting projects.
In essence, the Fuji Semi-PRO 2 HVLP Spray System is more than just a handheld paint sprayer for cabinets—it’s an investment in quality, efficiency, and artistry. It promises not only to change the way you approach cabinet painting but also to elevate the final results beyond expectations, making it an invaluable asset for anyone serious about achieving professional-grade finishes in their home or workshop.
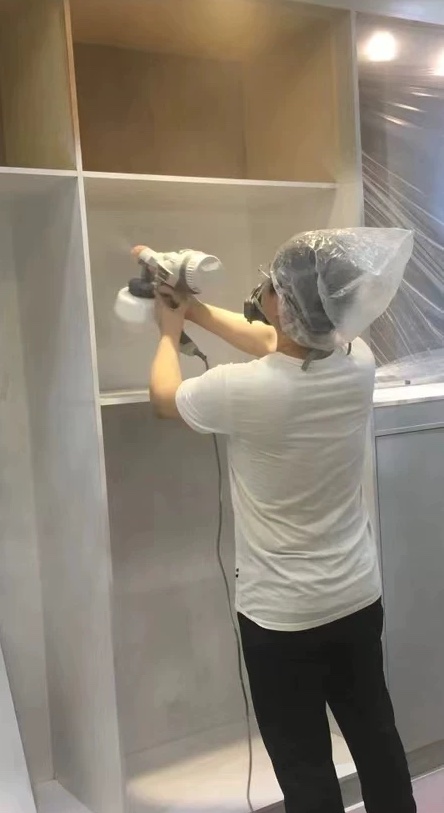
Mastering Cabinet Painting with a Paint Sprayer: Essential Tips for Flawless Results
Achieving a professional finish on cabinet painting projects with a sprayer is both an art and a science. It requires the right tools and a methodical approach to preparation, execution, and finishing touches. Here are some invaluable tips to help ensure your cabinet painting project is a resounding success:
Thorough Preparation: The Foundation of Excellence
- Surface Preparation: Begin with meticulously cleaning and sanding the cabinet surfaces. This step is crucial for removing old paint, grease, and any imperfections, ensuring the new paint adheres smoothly and evenly.
- Hardware Removal: Detach all handles, knobs, and hinges. This not only protects the hardware but also allows for a more professional finish, as painting around these items can lead to a less-than-perfect result.
- Taping and Covering: Use painter’s tape to protect the interior edges and any parts of the cabinets you wish to remain paint-free. Cover all adjacent areas and surfaces with drop cloths or plastic sheeting to shield them from overspray.
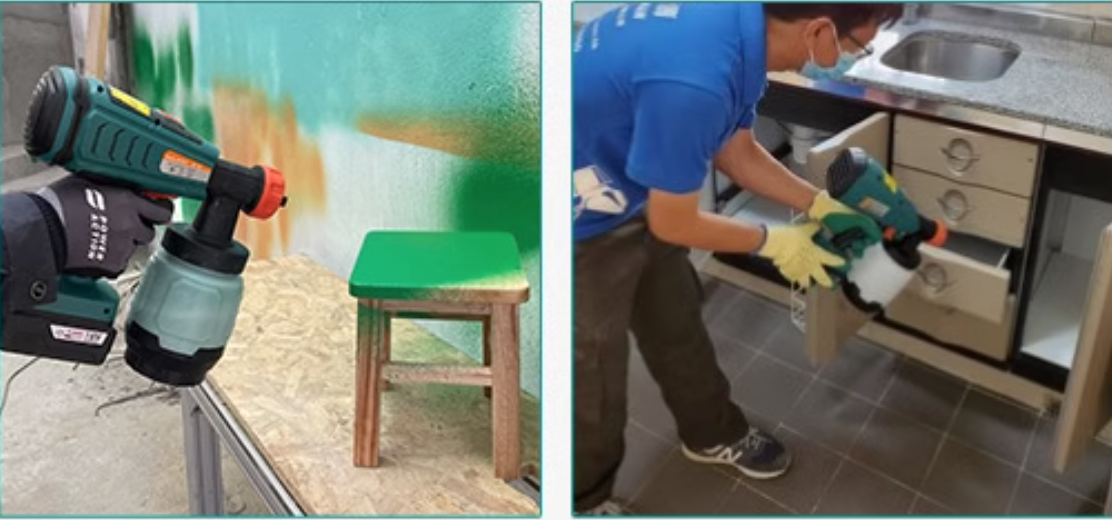
2. Practice and Familiarization: Get to Know Your Sprayer
- Trial Runs: Before applying paint to your cabinets, spend some time practicing with your sprayer on a piece of scrap wood or cardboard. This will help you get accustomed to the spray pattern, pressure settings, and the feel of the sprayer in your hand.
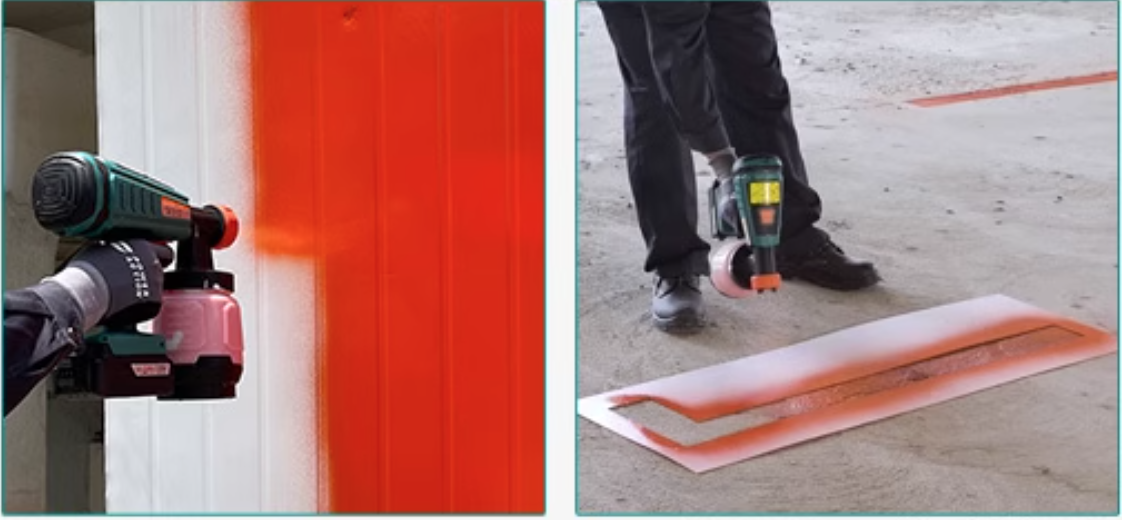
Consistent Application: The Key to Uniform Coverage
- Steady Pace: Maintain a constant speed when spraying. Moving too quickly can result in light coverage, while too slow a pace may deposit too much paint, leading to drips or sagging.
- Overlap Technique: Each stroke should slightly overlap the previous one. This approach helps prevent missed spots and contributes to a smooth, uniform finish without visible lines.
Perfecting the Paint Consistency
- Viscosity Check: Test the paint’s viscosity to ensure it’s suitable for spraying. Paint that’s too thick may clog the sprayer, while too-thin paint might run or sag. Adjust the paint’s thickness according to the sprayer’s instructions, often requiring thinning to achieve the optimal consistency.
Protecting Your Space
- Overspray Precautions: Even with careful application, overspray can occur. Protect your workspace, including countertops, appliances, and floors, to keep them clean and paint-free.
Cleanup and Care
- Post-Project Maintenance: After completing your project, take the time to thoroughly clean your sprayer according to the manufacturer’s guidelines. Proper cleaning and maintenance extend the life of your sprayer and ensure it’s ready for your next project.
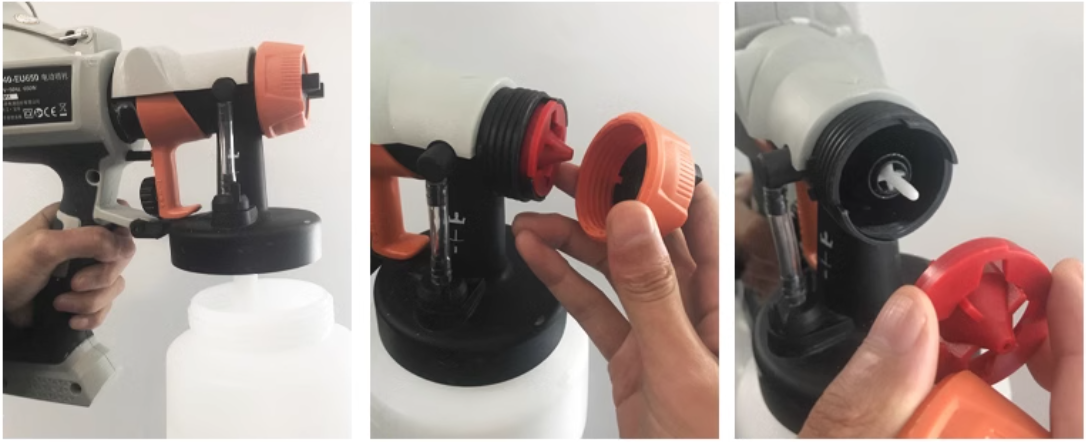
Essential Guide to Cleaning Your Paint Sprayer: Tips for Maintenance and Longevity
By following these tips, you’re setting the stage for a successful cabinet painting project that not only transforms the look of your cabinets but does so with a professional, durable finish. Whether you’re a seasoned DIYer or taking on a cabinet painting project for the first time, the right preparation, techniques, and care can make all the difference in achieving the high-quality outcome you desire.
Maintaining your paint sprayer through proper cleaning after each use is crucial for preserving its efficiency and extending its lifespan. Here’s a comprehensive guide to ensure you clean your paint sprayer effectively:
Initial Flush with Solvent
- Start by flushing the system with a solvent that’s compatible with the type of paint you’ve used. Continue running the solvent through the sprayer until it runs clear, ensuring all paint is completely removed.
Nozzle and Filter Maintenance
- Detach the nozzle, along with any filters, strainers, or screens. These parts often harbor the most paint residue and need individual attention. Use a soft brush and the appropriate solvent to clean them meticulously.
Disassemble for Detailed Cleaning
- If your model allows, disassemble the sprayer according to the manufacturer’s guidelines. Clean each part separately, focusing on the spray gun, fluid passages, and seals. This step is critical for removing paint from every nook and cranny.
Soaking for Tough Residue
- Parts with stubborn paint buildup can benefit from soaking in solvent. Check your manual for recommendations on soaking times to avoid damaging the parts.
Thorough Scrubbing
- Employ brushes, scrub pads, or even toothpicks for cleaning hard-to-reach areas. Be gentle to avoid damaging sensitive components.
Rinse with Clean Water
- After all parts are solvent-clean, rinse them with clean water. This step ensures the removal of any remaining solvent and paint residues.
Inspect and Replace Seals
- Examine seals, O-rings, and gaskets for wear and tear. Compromised components should be replaced to prevent future leaks and ensure efficient operation.
Lubrication for Durability
- Lightly lubricate all moving parts and seals with the lubricant recommended by your sprayer’s manufacturer. This prevents corrosion and ensures smooth functionality.
Reassemble with Care
- Reassemble your paint sprayer, following the assembly instructions closely. Proper reassembly is vital for the sprayer’s optimal performance.
Final Flushing
- After reassembly, run clean water through the sprayer to ensure it’s free from any solvent or residual paint. This step confirms that the sprayer is clean and ready for its next use.
Storage
- Store your sprayer in a dry, safe place, protected from extreme temperatures and conditions that could cause damage.
By adhering to these detailed cleaning steps, you safeguard your investment in a paint sprayer, ensuring it remains a reliable tool for your painting projects. Regular and thorough cleaning not only enhances the sprayer’s performance but also mitigates the risk of problems during future uses. Always consult your sprayer’s user manual for model-specific instructions and recommendations to keep your equipment in top condition.
Optimizing Your Paint Spraying Projects: Must-Have Accessories
Equipping yourself with the right accessories for a handheld paint spraying project is not just about enhancing efficiency; it’s about ensuring the safety, precision, and longevity of your tools. Whether you’re undertaking a cabinet painting project or any other paint job, here are essential accessories that will elevate your painting experience:
Protective Gear for Safety
- Safety Goggles and Masks: Essential for protecting your eyes and respiratory system from paint particles and fumes. Always opt for a high-quality mask that can filter out the smallest of particles.
- Gloves: Wear gloves not only to protect your skin from paint but also to improve your grip on the sprayer, especially during long projects.
Surface Protection
- Drop Cloths or Plastic Sheeting: Vital for keeping your floors, furniture, and adjacent areas free from paint splatters and spills. Reusable cloths offer an eco-friendly option, whereas plastic sheeting can be disposed of for quick cleanup.
Nozzle Tips for Versatility
- Brass Spray Tips: Investing in durable brass tips of varying sizes and angles can significantly affect the outcome of your project. Different tips allow for customization according to the viscosity of your paint and the complexity of your surfaces, from wide sprays for broad surfaces to fine tips for detailed work.
Paint Strainer for Smooth Operation
- A paint strainer is crucial for removing impurities from your paint, preventing clogs in your sprayer, and ensuring a smooth, uniform application. Always strain your paint before filling the sprayer’s reservoir.
Extension Poles for Reach
- Extension poles can be a game-changer for painting higher areas without the need for a ladder, offering safety and convenience. These poles allow you to maintain a steady hand while reaching elevated surfaces.
Cleaning and Maintenance Tools
- Cleaning Brushes and Solvent: Proper cleaning is crucial for the maintenance and longevity of your paint sprayer. Use specific brushes and the recommended solvent to clean every component thoroughly after use.
Extra Containers and Lids
- Having additional containers can be extremely useful for switching between paint colors or types without stopping to clean. Lids will keep your paint from drying out if you need to pause your project.
Pressure Regulator
- A pressure regulator can enhance your control over the paint flow, allowing for adjustments to achieve the perfect finish regardless of the paint’s thickness or the project’s scale.
By incorporating these accessories into your handheld paint spraying arsenal, you not only prepare yourself for a wider range of projects but also ensure that each task is executed with the utmost care and quality. From protective gear to enhance safety to specialized nozzles for precision, these tools are designed to support your goal of achieving professional-grade results in every painting endeavor.
Choosing the Ideal Paint for Cabinet Transformations
Embarking on a cabinet painting project presents an opportunity not only to refresh the appearance of your kitchen, bathroom, or storage areas but also to enhance durability and functionality. The selection of paint plays a pivotal role in ensuring the longevity and aesthetic appeal of your cabinets. Here’s a detailed guide to choosing the best paint for your cabinetry:
The Superior Choice: Water-Based Acrylic or Latex Paints
Advantages:
- Durability: Designed to withstand the rigorous demands of daily use, high-quality water-based acrylic or latex paints offer a robust solution for cabinetry. Their resilience against chipping, staining, and fading is essential for surfaces that encounter frequent handling.
- Adhesion & Finish: These paints are celebrated for their excellent adhesion properties, providing a smooth and consistent finish that enhances the overall look of the cabinets.
- Health & Safety: Emitting lower levels of odors and volatile organic compounds (VOCs), water-based paints are a healthier choice for indoor environments, reducing the need for extensive ventilation during application and drying.
- Quick Drying & Easy Cleanup: The quick-drying nature facilitates a faster project turnaround. Moreover, cleanup is hassle-free, requiring just soap and water, simplifying the post-painting process.
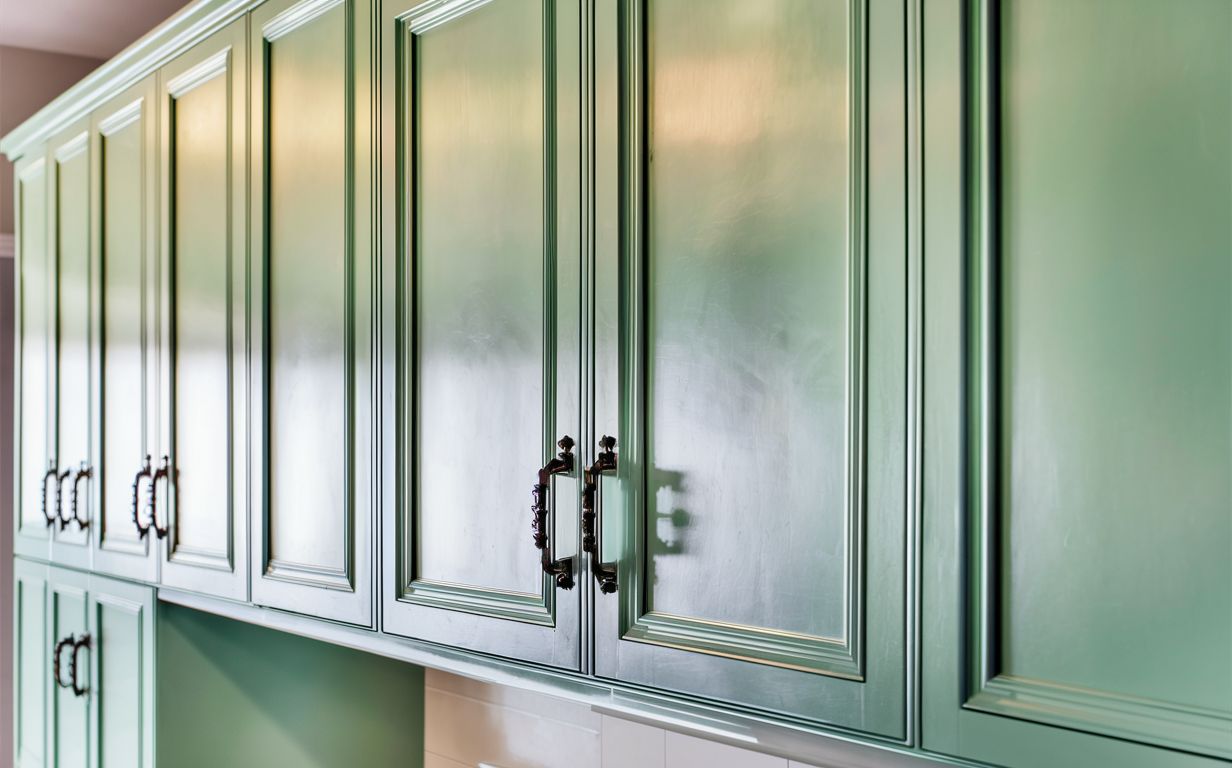
Finish Types: Satin or Semi-Gloss
Choosing the right finish is as crucial as selecting the paint type. Satin and semi-gloss finishes are often recommended for cabinets due to their practical and aesthetic benefits:
- Ease of Cleaning: Both finishes allow for easy cleaning, which is vital for maintaining hygiene, especially in kitchen environments.
- Aesthetic Appeal: They provide a slight sheen that enhances the cabinet’s appearance while not overly highlighting minor surface imperfections.
Articles Worth Reading:
Personal Experience & Recommendation:
In our recent project, we opted for enamel paint, a type of latex-based paint, for our basement cabinetry. The results were outstanding, affirming the suitability of high-quality latex paints for cabinetry. The durability, ease of application, and aesthetic finish offered by this paint choice contributed significantly to the project’s success.
The Importance of Priming
Priming your cabinets before painting is a step that should not be overlooked. It ensures better adhesion of the paint to the surface, enhances paint durability, and provides a more uniform finish. Especially when dealing with dark cabinets that you wish to paint a lighter color, priming can save you from needing multiple coats of paint.
Conclusion: A Fusion of Functionality and Beauty
Selecting the right paint for your cabinet painting project is a blend of art and science. It requires considering both the functional demands of the environment and your aesthetic preferences. Water-based acrylic or latex paints, particularly in satin or semi-gloss finishes, stand out as the optimal choice for most cabinet painting projects. They ensure that your cabinets not only look beautiful but also stand up to the test of time and use. Paired with the correct painting techniques and a suitable paint sprayer, your cabinets can undergo a transformation that combines durability with style, making them a highlight of your home’s interior design.
FAQ: Cabinet Painting with Paint Sprayers
What’s the difference between HVLP and airless paint sprayers for cabinet painting?
- HVLP (High-Volume, Low-Pressure) Sprayers: Ideal for detailed work, they use low pressure to produce a high volume of paint, minimizing overspray and offering better control for a smooth finish.
- Airless Paint Sprayers: They pump paint at high pressure through a nozzle without using air, which is suitable for covering large areas quickly. However, they tend to produce more overspray and require more preparation to protect surrounding areas.
Can I use any type of paint in a paint sprayer for cabinets?
- Not all paints are suitable for use in all types of paint sprayers. Water-based acrylics or latex paints are generally compatible with most sprayers, but heavier oil-based paints may require thinning or specific types of sprayers. Always check the manufacturer’s recommendations.
How do I prevent overspray when using a paint sprayer on cabinets?
- Use painter’s tape and plastic sheeting to mask off areas not being painted. Practice controlling the spray pattern on cardboard before starting on your cabinets, and always spray at a consistent speed and distance.
Do I need to thin the paint before using it in a paint sprayer for cabinets?
- It depends on the type of paint and the sprayer. Some sprayers can handle thicker paints without thinning, while others may require thinning for optimal flow. Refer to both the paint and sprayer instructions for guidance.
What’s the recommended distance between the paint sprayer and the cabinet surface?
- The optimal distance is usually between 6 to 12 inches, but this can vary based on the specific sprayer and the type of paint being used. Consult your sprayer’s manual for the best practices.
How do I clean a paint sprayer after using it for cabinet painting?
- Flush the system with a suitable cleaning solution, such as water for water-based paints or mineral spirits for oil-based paints. Disassemble the sprayer to thoroughly clean each component, especially the nozzle and filters.
Can I spray cabinets without removing them?
- Yes, but it’s recommended to remove doors and hardware for a more professional finish. If spraying is in place, ensure proper masking and protection for the surrounding area.
Is primer necessary before spraying cabinets?
- Yes, applying a primer is crucial for ensuring paint adhesion, enhancing durability, and achieving a uniform finish, especially when changing the cabinet color or painting over wood.
How long does it take for painted cabinets to dry?
- Drying times vary by paint type. Water-based paints are typically dry to the touch within a few hours, but it’s best to wait 24-48 hours before reassembling or closing doors to ensure the paint is fully cured.
Can I achieve a smooth finish with a paint sprayer on the cabinets?
- Absolutely. Paint sprayers are excellent for achieving a smooth, brushstroke-free finish. HVLP sprayers, in particular, are well-suited for getting a fine finish on cabinets.
What safety precautions should I take when using a paint sprayer?
- Always wear protective gear, including a mask, safety goggles, and gloves. If working indoors, ensure good ventilation and follow all manufacturer guidelines for safe operation.
By understanding these FAQs, you’ll be better prepared to tackle your cabinet painting project with a paint sprayer, achieving professional results with efficiency and precision.